
Coloring comics can be a challenging but rewarding task, and Corel Photopaint provides a wide range of tools to help you achieve professional-looking results. Whether you’re a beginner or an experienced comic artist, this software offers the tools you need to bring your illustrations to life. In this blog, we’ll take a closer look at how to color comics using Corel Photopaint.
Step 1: Set up your workspace
Before you start coloring your comic, it’s important to have a clean and organized workspace. Photopaint provides a variety of customizable palettes, so you can easily access the tools you need throughout the coloring process. You can also set up custom color swatches to keep your colors consistent throughout the project.
Step 2: Import your line art
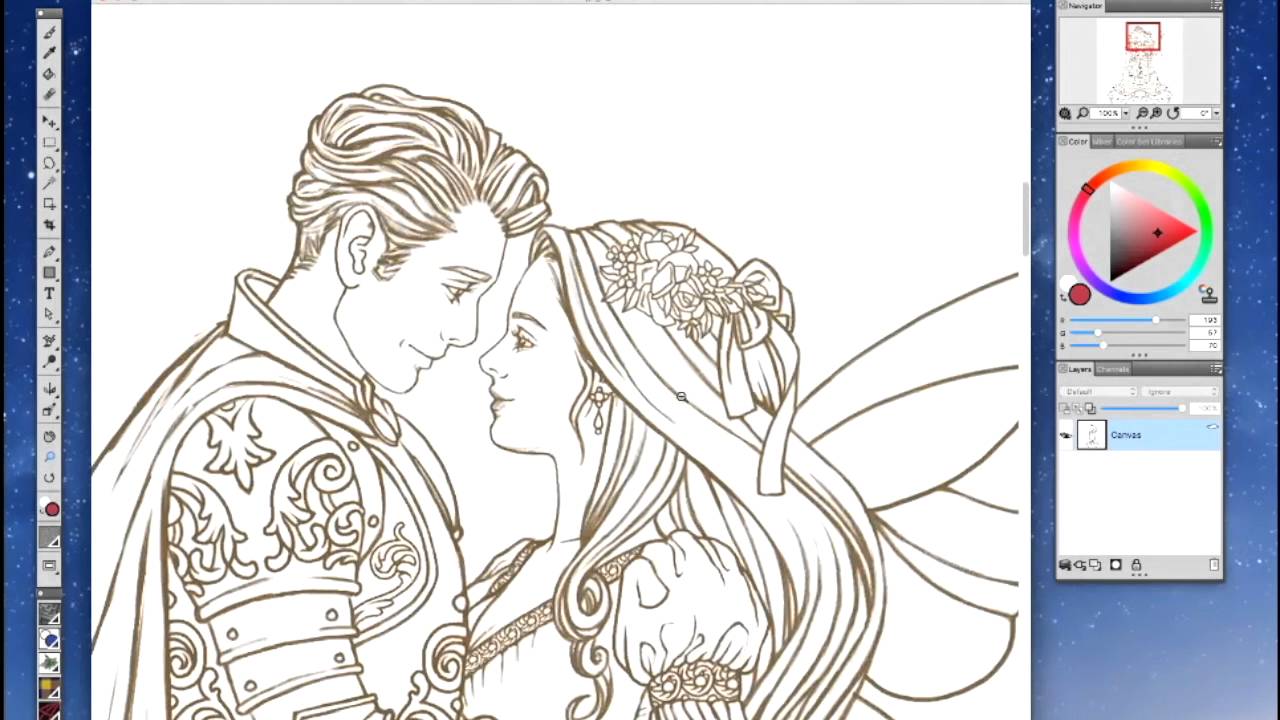
Once your workspace is set up, it’s time to import your line art into Photopaint. You can either scan or digitally import your line art into the software. To ensure the best results, it’s important to have a high-quality image to work with. Once your line art is imported, you can adjust the brightness, contrast, and other settings to make sure the lines are clear and visible.
Step 3: Add color
There are several methods to add color to your comic in Photopaint, but one of the most straightforward is to use the Fill tool. With the Fill tool, you can quickly color large areas of your comic, such as the background or clothing. To use this tool, simply select the area you want to color, choose a color from your swatch, and click the Fill button.
Step 4: Use layers
To keep your coloring organized and make it easier to make adjustments later on, it’s a good idea to use layers in Photopaint. You can create a new layer for each color layer, such as a base color, shadow, and highlight. This will give you more control over your colors and help you to achieve a more professional look.
Step 5: Adjust colors and add shading
Once you’ve added color to your comic, it’s time to fine-tune your colors and add shading to give your illustrations more depth and dimension. Photopaint provides a range of tools for adjusting colors, including hue, saturation, and brightness. You can also use the Brush tool to add shading and texture to your colors.
Tip: Keep Line Art from Being Colored
One of the challenges in coloring comics is making sure that the line art remains visible and doesn’t get colored over. To prevent this from happening, there are a few tips you can follow in Photopaint:
Lock the line art layer: This is the simplest and most effective way to ensure that your line art stays intact. Simply go to the Layers panel, right-click on the line art layer, and select “Lock Layer.” This will prevent you from accidentally coloring over the line art.
Use a transparent color for the line art layer: This allows you to see the line art through the color layers. To do this, simply select the line art layer, change the opacity to 0%, and lock the layer.
Use a Clipping Mask: This is a useful technique for creating separate color layers that are restricted to the line art layer. To create a Clipping Mask, simply create a new color layer, right-click on the color layer and select “Create Clipping Mask.” This will restrict the color layer to the boundaries of the line art layer.
By following these tips, you can make sure that your line art remains visible and that your colors stay separate from the line art. This will help you achieve a more professional look and bring your comic to life.
Finally, once you’re satisfied with your coloring, it’s time to save and export your comic. Photopaint allows you to save your project as a native .cpt file or export it as a .jpeg or .png file. If you’re planning to print your comic, it’s important to make sure that your colors are in CMYK format and that your resolution is high enough for printing.


